How To Install Acoustic Panels
How To Install Acoustic Panels Video Transcript
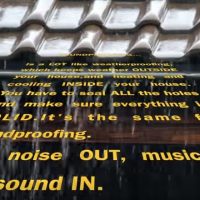
Acoustic panels will improve the sound quality of your room. It helps reduce background noise, improve sound absorption and it’s usually used for acoustic treatment. However, if you’re wondering how to install acoustic panels on wall? Here’s how.
Acoustic panels will improve the sound quality of your room.
To install an acoustic wall panel, you’ll need the included mounting kit, a drill, a level, a measuring tape, and painter’s tape.
First, place the soundproof panel facedown on a clean hard surface. Then attach the Z-Clips with screws to the metal plates on the back of the panel.
Don’t use an impact driver for the self-tapping Z-Clip screws, because the metal plates can be stripped with too much force. Go slowly and don’t seat the screws too tightly. If you’re unsure about the amount of force to apply, use a hand driver for the final tightening.
After all four acoustical panel clips are installed, it’s time to install the wall clips.
The key to a good installation is transferring panel centerlines and distances to the wall so the mounting clips are level and plumb. Here’s how to measure and mark centerlines and mounting points.
Insert a blank Z-Clip in the top clip and repeat for the bottom clip on the same side. Measure the distance between the bottom of both blank clips, add two and one-eighth inches, and write down the top-to-bottom-clip distance.
With the center of your panel’s wall location marked with tape, measure up from the floor to the vertical center point. Here, it’s at four feet.
Insert blank clips into the top two panel-mounted clips.
Use a straightedge to mark a line even with the bottom of the blank clips.
Then measure and mark the center between the two clips. Write down the center-to-side-clip distance to use later for the wall clip marks.
Mark the acoustic wall panel’s centerline by measuring down half the height from the top. Then measure the distance from that centerline to the line drawn at the bottom of the blank clips. Write down the center-to-top-clips distance for the following step.
Place the bottom corner of the vertical level at the center-point on the wall, check for level, and place another piece of tape on this vertical line. Put a mark at the written center-to-top-clips distance. This is the top-clip mounting line.
Place the level at the top-clip mounting line. Check for level, then mark two three-inch clip-mounting reference lines, starting at the center-to-side-clip distance written earlier. Here, it’s three inches to each side.
Place the bottom of a blank clip on the first reference line and mark the wall-anchor locations in the two slots. Then repeat.
Push a screw-point gently into the center of each wall anchor slot mark as a wall anchor guide.
Carefully screw in each wall anchor, starting with the sharp tip of the wall anchor placed in the guide indentation. Go slowly and don’t over-tightening the anchors.
The Z-Clips can now be screwed into the wall anchors using the long mounting screws. Then remove the tape.
Remember the top-to-bottom-clip distance you wrote down at the beginning? Now measure that distance straight down from the top clip for the bottom clip line. Repeat this measurement on the other side.
Place the top corner of the vertical level at the center-point on the wall, check for level, and place another piece of tape on this vertical centerline. With the level placed horizontally, check for level, and use the previous center-to-side-clip distance measurement to mark two three-inch clip-mounting reference lines, starting from the taped centerline.
Repeat the installation process for the two bottom clips. These instructions will work for all of our Z-Clip-mounted acoustic soundproof panels.
Our acoustic panels are great-looking, provide sound absorption, reduce background noise and improve your sound quality, which make it a great acoustic treatment.
 What’s First?
 How Sound Works (In Rooms) (AcoGeo)
 Your Brain On Sound (AcoGeo)
 Acoustic Panels – What & Where (AcoGeo)