Installing Envirocoustic Wood Wool Panels & Envirocoustic Wood Wool Hexagon Panels
In our blog and video, Your Brain On Sound, we discuss the nature of sound and human hearing. We look at how our brains interpret subtle differences in timing and tone to construct accurate sound images of our environments. In much the same way that our binocular vision enables us to perceive the world in three dimensions, our ears similarly enable us to locate and determine the sources of sound.
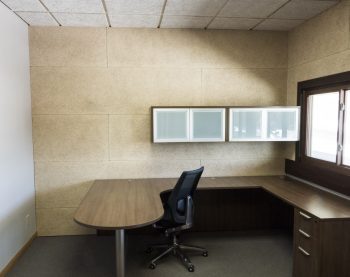
Whether for a theatre, sports arena, performance hall, restaurant, factory, gymnasium, office, boardroom, bedroom, or home entertainment space, the same principles of acoustic design and human hearing apply. Depending on how reflective the surfaces of the walls, ceilings, and floors are, unwanted reverberation and echo can severely compromise the acoustical qualities of any space.
A sound wave, once emitted, will continue to reflect off hard wall, floor, and ceiling surfaces until it loses energy and dies out. In an open space with hard surfaces, we hear a high degree of echo (early discrete repetitions), and reverberation (multiple later blended echo repetitions). Typically, we prefer acoustical environments that don’t generate too much echo, but reducing reverberation too much will also make a room sound “dead,” so we need to find the right balance of absorption and diffusion.
Allowing too much echo and reverberation, on the other hand, compromises our brains’ ability to form accurate sound images. Reflected sound arrives at our ears from multiple directions and interferes with direct sound.
Reducing Echo and Reverberation Through Sound Absorption
To mitigate echo and reverberation, you can treat the hard surfaces of rooms with wall and ceiling panels that absorb the energy of reflected sound. Each room’s size, layout, and construction materials combine to determine that specific space’s acoustical properties as well as the appropriate acoustical treatment strategies for it.
If you’ve opted to treat your room with sound absorbing wall panels, our Envirocoustic™ Wood Wool Cementitious Wood-Fiber Acoustic Ceiling and Wall Panels now lead in the eco-friendly, high-performance, acoustical-panel products category.
Cost-effective and manufactured from 3 simple ingredients – wood fiber, cement, and water – Envirocoustic™ panels are durable, Class A Fire Rated, and they provide thermal insulation in addition to absorbing sound. They are also available in both wall and ceiling applications.
Installing Envirocoustic™ Wood Wool Wall Panels
The following provides you step-by-step instructions on how to install our Envirocoustic™ Wood Wool Wall Panels. For further visual reference, you can also view our instructional video.
Equipment and Materials 
- Envirocoustic™ Wood Wool
- Cementitious Wood Fiber
- Acoustic Wall Panels
- ¾” × 4″ (or 1″ × 4″) horizontal, pine mounting strips/strapping
- Table saw
- Power drill
- Measuring tape
- Marking pencil
- Level
- 1 ¾” wood screws
A few general tips to help you achieve the best results:
- Pre-paint the heads of the screws so they match the color of your panels.
- Check level on your panels often as you progress through the installation process.
- Work carefully at all times because panel edges and corners can be damaged.
- Panels can also be heavy, so ask someone to help you if you need it.
- Always ensure that the panels are all seated flush against the mounting strips.
- It may sometimes be necessary to back-out and re-seat screws to ensure that the panel is seating flush with the mounting strips.
- Always ensure that screws have a minimum ¾” spacing from the edges of the panels.
- Drive screws slowly to avoid damaging or mis-aligning the panels.
- Careful layout yields best results.
Contact us for more acoustics and soundproofing help here.
Preparing your wall
- Remove previous wall surface.
- Install ¾” × 4″ horizontal mounting strips on 23¾” vertical centers. (Note: Use 1″ × 4″ strapping if you also wish to install 1”-thick acoustic backing.)
- Draw horizontal lines using a level on the 23¾“ vertical centers. (You’ll be able to use these lines as visual references when you attach the panels horizontally.)
Measuring, cutting, and placing your panels
- Measure the height of the first panel from the floor to the previously-drawn horizontal line.
- Cut the first panel to the exact width of your first measurement.
- Carefully position the panel, horizontally, at the bottom corner of the wall.
- Make sure the panel is flush with both mounting strips.
- Slowly drive a screw into the top corner.
- Screw in the rest of the panel at 24″ intervals. (For high traffic ceiling installs, screw in on 12″ centers.)
- Ensure screws have a minimum ¾” spacing from the edges of the panel.
- Double check that the newly-installed panel is level because it will set the alignments for all the following panels. (Note: We recommend that you drive the screws slowly to avoid damaging or mis-aligning the panels. Ensure that the panels are all seated flush against the mounting strips.)
For staggered panel designs
- Transfer the end mark to the next-higher mounting board.
- Measure half the panel length, and mark the mounting board.
- Measure half the length of a panel, and cut the panel. (Note: Depending on the configuration of the wall, you may need to cut a notch in the end of the panel to accommodate the adjacent corner wall mounting strip.)
- Ensure the panel is flush against the end wall, both mounting strips, and sitting snugly and level above the first-installed panel.
- Check for level.
- Drive in top corner screw.
- Drive in remaining screws at recommended spacing. (see #6 in Measuring, cutting, and placing your panels)
- Ensure screws have a minimum ¾“ spacing from the edges of the panel.
- Continue this process until you have completely covered your wall with panels. (Note: Carefully measure each panel’s width (and height, if relevant) carefully – walls ceilings, and/or floors may be out-of-plumb or out-of-level, and there may be other non-standard construction issues.)
Installing Wood Wool Hexagon Panels
You can apply our Wood Wool Hexagon Panels directly to bare wall surfaces using our Titebond GREENchoice Panel & Subfloor Adhesive to create innovative finished designs. Below, you’ll find a step-by-step guide to installing our Hexagon panels, and for visual reference, you can also watch our instructional installation video.
Equipment and Materials
- Envirocoustic™ Wood Wool Hexagon Panels
- Titebond GREENchoice Panel & Subfloor Adhesive
- 1½“ Finishing (16 ga. or similar) nails and finish-nail gun
- 1½“ screws and power driver – Tip: Pre-paint the heads of the screws so they match the color of your center panel.
- Caulking gun
- Utility knife
- Tool to puncture inner seal of adhesive cartridge
- Measuring tape
- Marking pencil
- Level
Preparing your wall
- On a bare wall, measure and draw a level, horizontal line along the center of the wall. This will serve as your guide for positioning your center panel, so make sure it’s level.
- Ensure the wall surface is smooth and free of irregularities that could prevent a flush contact between it and the hexagon panels.
- Apply firm and even pressure to the panels to ensure that they are making flush contact with the wall and that the adhesive is firmly seated while you are screwing or nailing them into place.
Installing your Wood Wool Hexagon panels
- Trace the perimeter of the back of the first panel with a bead of adhesive about 1-1/2” from the edge.
- Lay two more perpendicular beads of adhesive to mark an X on the back of the panel.
- Using the line you drew as a guide, carefully position the glued side of the panel on the wall.
- Apply firm, even pressure on the panel, ensuring that it is making flush contact with the wall and that the adhesive is firmly seated.
- Screw in the first panel, spaced at least ¾” from the edge of the panel, at all six hexagon corners.
- Align the second, pre-glued hexagon panel with one edge of the previously-installed panel, applying slight pressure toward the previous panel’s edge.
- Apply firm, even pressure while attaching the second and subsequent panels with finishing nails spaced at least ¾” from all six hexagon corner edges.
- Repeat steps 6 – 8 until you have completely covered the desired surface area of the wall.
- Good panel alignment yields good-looking results.
Conclusion
Envirocoustic Wood Wool panels, both rectangular and hexagonal, look great, help to absorb sound, and they’re easy to install.
Let Acoustical Surfaces help resolve your noise problem today! Learn how by submitting your noise problem here.

