RSIC-1: Resilient Channel Sound Isolation Clips


Professional-Grade Acoustic Control for Walls and Ceilings

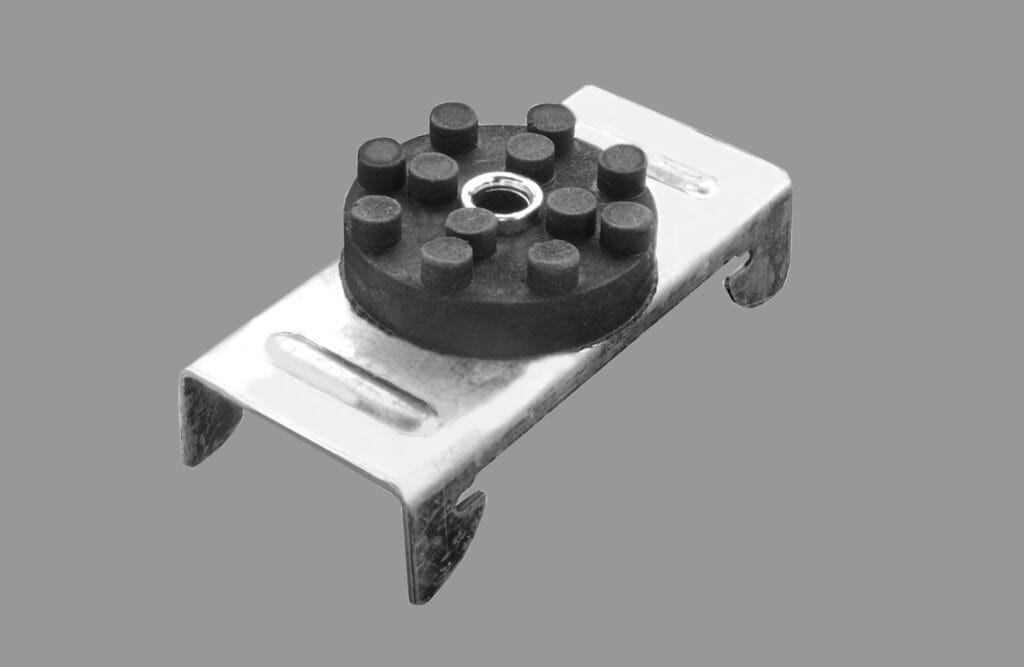
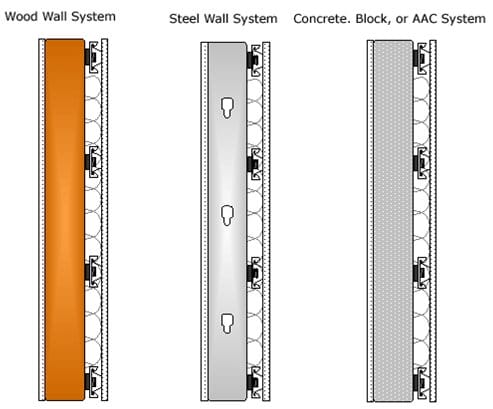
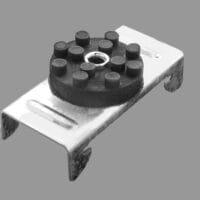
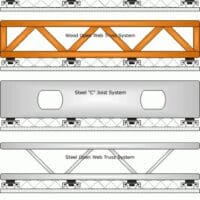
The RSIC-1® Sound Isolation Clip is the industry’s most economical and effective solution for reducing sound transmission in wood, steel, CMU, or concrete wall and ceiling assemblies. Engineered for both new construction and retrofit applications, the RSIC-1® system decouples and isolates gypsum board or plywood from the structure, dramatically increasing acoustical performance while maintaining structural integrity.
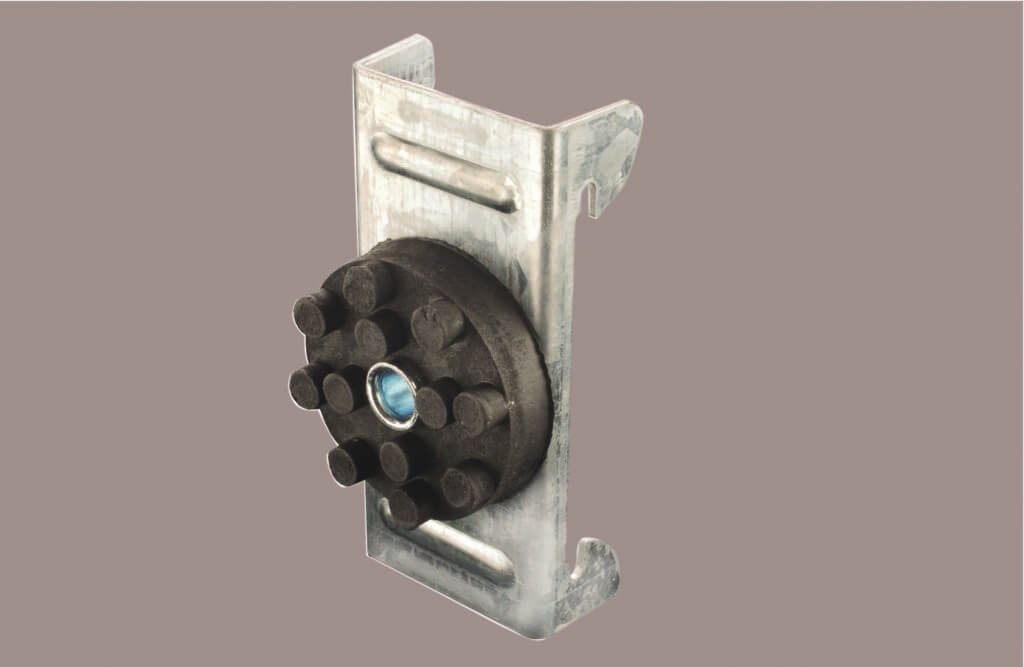
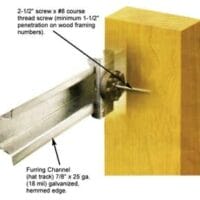
Each RSIC-1® clip supports an acoustical design load of 36 lbs and can carry up to two layers of 5/8″ gypsum board when spaced at 24″ x 48″ O.C. For heavier assemblies, additional isolators can be added to meet load requirements. The clip and 7/8″ hat channel (noted below) creates a 1-5/8″ cavity between the framing and drywall, stopping airborne noise and vibrations that would otherwise transfer through rigid connections. When used with 7/8″ 25-gauge galvanized steel hat channel, the system ensures professional-grade decoupling, significantly improving both airborne and impact sound control.
Proven Acoustic & Fire Performance
- Field-tested improvements of up to 20 STC points in wall assemblies
- STC ratings up to 55, delivering a 19 dB improvement over standard walls
- Retrofit solutions available, improving existing walls and ceilings by 8–10 dB
- UL Classified in over 139 fire-resistive assemblies, with ratings from 1–4 hours
Versatile Applications
The RSIC-1® can be installed in residential, commercial, and institutional projects where high-performance sound control is required. It is also approved for use in shear walls, enhancing the performance of low-performing wall designs without compromising safety or code compliance.
Backed by decades of proven results, the RSIC™ family of products represents the most cost-effective way to achieve consistent, professional acoustic isolation across a wide range of construction scenarios.
Downloads / Product Resources
Product Data SheetTechnical specifications Installation
Step by step guide CSI Specs
Industry standard format Test Reports
Acoustic, fire and material testing Sustainability Documents
For projects pursuing LEED, WELL, or LBC Sustainability Documents
For projects pursuing LEED, WELL, or LBC
-
Product Specs
Applications
Residential, Commercial, Apartments/Condos, Hotels, Churches / Houses of Worship, Government, Law Enforcement, Restaurants, Retail, Music or Recording Studios, Offices, Classrooms, Podcast Rooms, Workout Facilities, Kennels, Medical / Examination Rooms, Manufacturing Plants, Band Rooms, Bars, Restaurants, Night Clubs, Airports, Auditoriums, Theaters and more
Material Composition
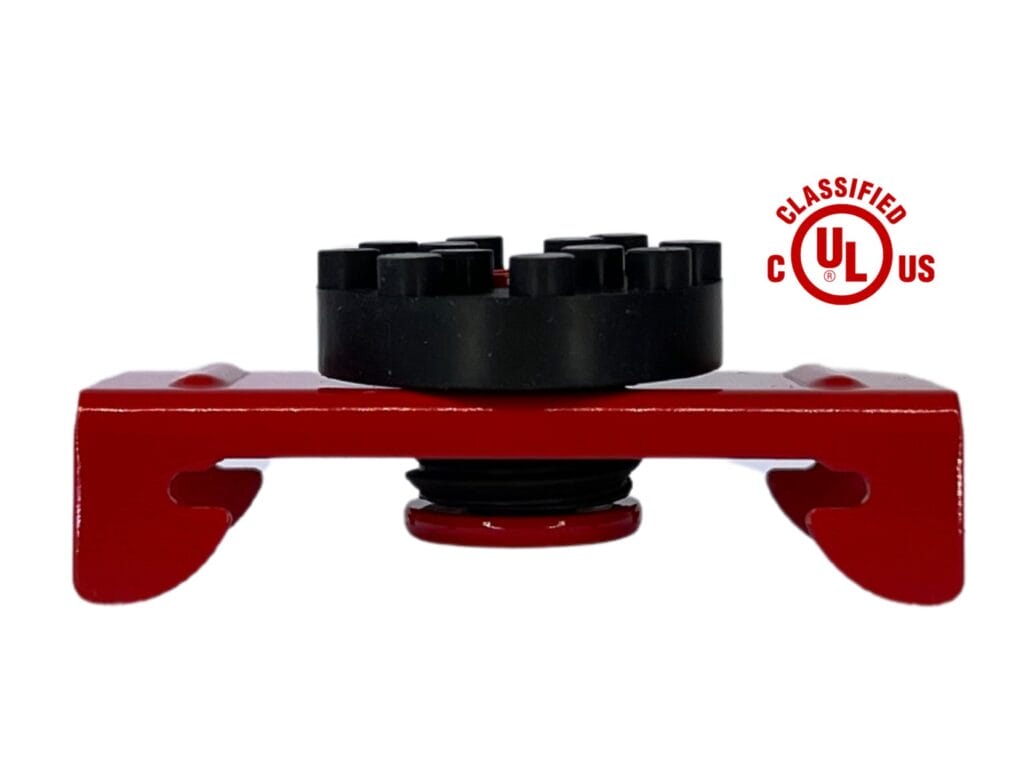
Metal bracket and screw sleeve and rubber isolator
Thickness
1 5/8" (with 7/8" hat chennel)
Color
Red metal bracket and sleeve and black rubber isolator
Installation Method
Mechanically attached to structure
-
Acoustical Specs
Acoustical Specs
Varies based on assembly and wall components. Wood and metal stud assembly up to STC 63
-
Material Performance
Fire Performance
Varies based on assembly. Assembly ratings up to 3 hour.