How Much Does it Cost to Install Soundproof Floor Underlayment?
If you’re planning a remodel in a house, business, hotel, condo, or mixed-use building, one of the first questions you’ll ask is about acoustic flooring cost. You may already know you need a soundproof floor underlayment to meet code or HOA rules – but what will it actually add to your project budget?
The answer depends on more than just the roll of material you buy. Floor type, building structure, moisture conditions, labor rates, and required sound ratings all influence total cost. In this guide, we’ll break down realistic price ranges, explain what drives those numbers, and clarify what actually improves performance – so you can budget with confidence and avoid common mistakes.
Acoustic Flooring Underlayment Cost – Quick Answer
Let’s start with a numbers-first snapshot.
Because labor rates vary dramatically between regions (downtown Manhattan versus rural Oklahoma, for example), it’s risky to quote one “average” number that applies everywhere. That said, most remodelers see underlayment show up in one of two ways:
Material-only (DIY scenarios)
- Basic foam underlay: roughly $0.30–$0.50 per square foot
- Some vinyl underlay options: around $0.50 per square foot
Materials + Professional Installation (line item within a full flooring job)
- Commonly lands in the range of $3.40–$5.30 per square foot, depending on material type, prep work, and project complexity
These numbers can move significantly based on:
- Material selection (foam vs rubber vs specialty composites)
- Thickness and density
- Whether a separate moisture barrier is required
- Subfloor condition and leveling needs
- Required acoustic targets (IIC 50 vs IIC 60, for example)
- Demo and haul-off of existing flooring
It’s also important to note: while products like cork or mass loaded vinyl sometimes appear in searches for soundproof flooring, they are not automatically effective when sandwiched between two hard surfaces. Performance depends entirely on the tested floor assembly, not just the material name.
Why Underlayment Matters in a Remodel
Underlayment plays a more critical role than most remodelers realize. In a properly designed floor assembly, it contributes to:
- Impact noise reduction (IIC) – Footsteps, dropped objects, chair movement
- Airborne sound reduction (STC) – Voices, music, television
- Moisture control – especially over concrete slabs
- Minor cushioning and subfloor leveling
- Manufacturer warranty compliance
If you’re installing laminate or luxury vinyl plank (LVP), the underlayment often becomes part of a floating system. That’s where terms like floating floor soundproofing come into play.
For higher-performance assemblies, products like Acoustik™ sound control underlayment or Duracoustic underlayment are commonly specified to improve impact isolation in multifamily or HOA-regulated environments.
One major caution: many LVP and laminate products now include attached underlayment backing. Adding an additional layer can actually reduce performance—or void the warranty—unless explicitly approved by the manufacturer. More thickness does not automatically equal better acoustics.
Sound Ratings 101: IIC vs STC (and Typical Condo / HOA Targets)
If you’re researching condo flooring soundproofing, you’ve likely encountered IIC and STC ratings. Understanding the STC vs IIC difference is essential before making material decisions.
- IIC rating measures impact sound isolation (footsteps, dropped objects)
- STC rating measures airborne sound transmission (voices, music)
In many municipalities and multifamily buildings, the minimum requirement is:
- IIC ≥ 50
- STC ≥ 50
Some higher-end buildings require ratings of 55–60 or more.
However—and this is critical—ratings apply to the full floor-ceiling assembly, not just the underlayment. An 8-inch concrete slab performs very differently than a wood joist system with drywall and resilient channel below.
To enhance full-system performance, additional materials such as Green Glue noiseproofing compound or mass loaded vinyl barriers can be incorporated into the ceiling or subfloor assembly to improve STC performance.
Before purchasing, always confirm requirements with your HOA or local building authority. Published ratings are guidelines—your structure determines real-world results.
General performance tiers (assembly-dependent):
- 45 → Often below condo requirements
- 50 → Meets many code minimums
- 55 → Common in higher-end buildings
- 60 → Premium acoustic performance
Acoustic Underlayment Cost by Material
Material selection is one of the biggest drivers of both cost and acoustic performance. Here’s a practical breakdown:
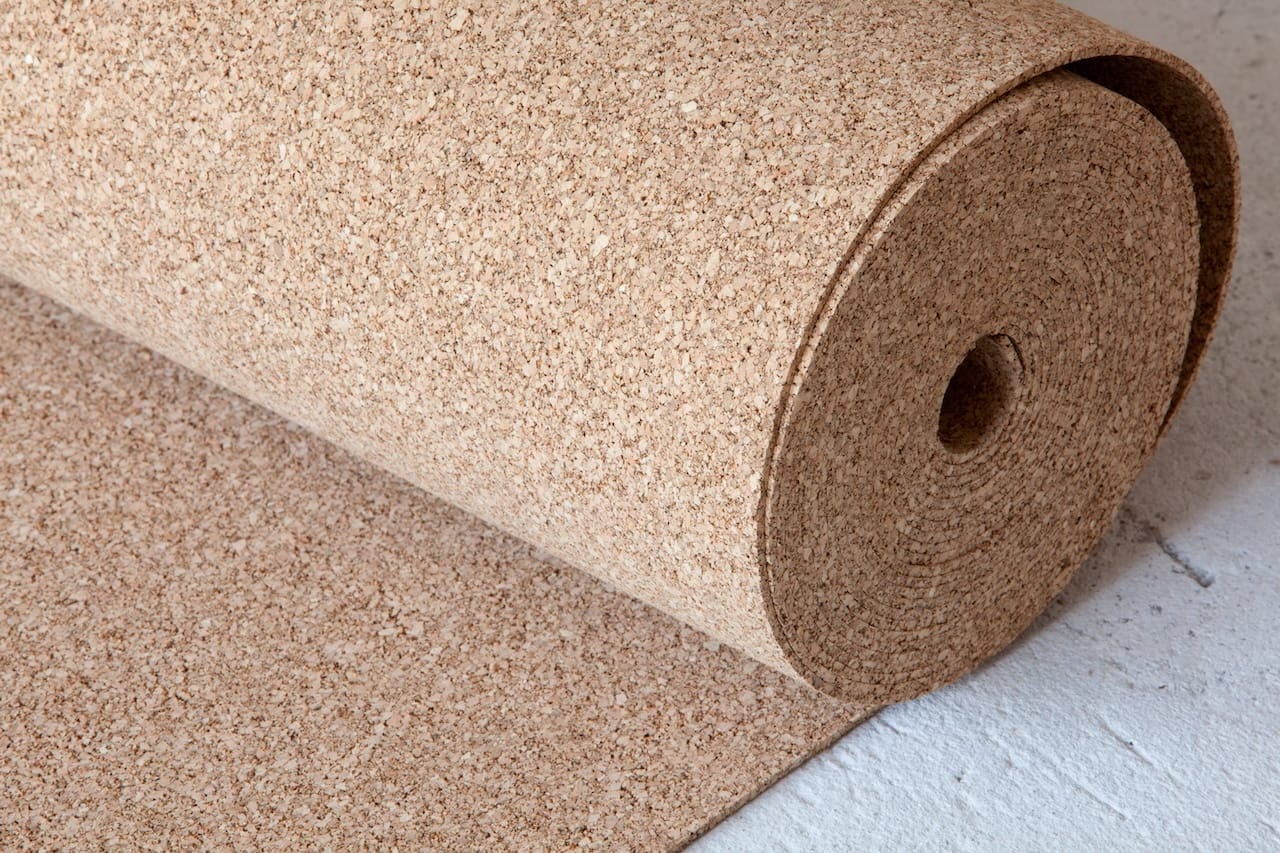
Cork
Cork is often marketed as a natural acoustic solution.
- Mid-range pricing
- Some versions include vapor barriers
- Moisture sensitivity must be considered
Performance varies significantly depending on the assembly—cork alone does not guarantee high IIC ratings.
Foam/Polyfoam (basic)
Foam underlayments are budget-friendly and widely used beneath laminate and LVP.
- Typical cost: $0.30–$0.50 per sq ft
- Modest impact performance
- Lightweight and easy to install
Best suited for: Single-family homes or spaces without strict HOA requirements.
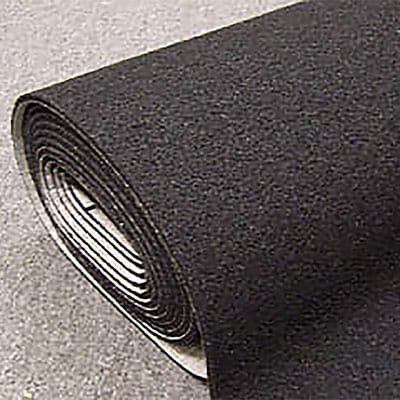
Rubber
Rubber underlayments are denser and typically offer stronger impact isolation.
- Higher cost tier
- Heavier material
- Common in multifamily construction
Rubber-based systems like Duracoustic are often selected when IIC 50+ thresholds must be achieved.
Peel-and-Stick Acoustic Systems
For faster installs or retrofit applications, peel-and-stick options like Acoustik Peel & Stick provide a streamlined solution with consistent coverage and reduced labor complexity.
Attached Underlayment (LVP/Laminate)
Many modern flooring products include factory-attached padding.
Pros:
- Simplifies installation
- Reduces material sourcing
Cons:
- Limited acoustic tuning
- High risk of improper double-layering
Always follow manufacturer specifications before adding supplemental materials.
Installed Cost per Square Foot for Remodel Scenarios
In real-world remodels, underlayment cost is rarely isolated. It’s part of a broader flooring system that includes demolition, prep, installation, and finishing.
Here’s how to think about total project costs:
- Material-only underlayment (basic foam): ~$0.30–$0.50 per sq ft
- Underlayment installed (materials + labor): Often $3.40–$5.30 per sq ft within a full flooring scope
- Demo and haul-off: Typically $1–$6 per sq ft depending on material and complexity
Additional upgrades—such as installing Acousti-Board Ultra or mass loaded vinyl in subfloor or ceiling assemblies—can increase cost but significantly improve acoustic performance.
Complex conditions like stairs, self-leveling, or structural repairs will push costs higher.
Condo / HOA Remodels: How to Hit the Rating and Pass Approval
Condo flooring soundproofing comes with documentation requirements. In many multifamily buildings, approval is mandatory before materials are delivered or demolition begins.
HOAs and property managers are focused on protecting adjacent units from both impact and airborne noise. That means your submittal package often needs to include:
- Product data sheets
- IIC/STC test reports (assembly-based)
- Installation details
Using tested systems—such as assemblies incorporating Acoustik underlayment, Green Glue, and acoustic barriers—can streamline approval and reduce the risk of costly rework.
The key takeaway: passing HOA approval isn’t just about choosing a product—it’s about specifying a complete, tested system that performs in your specific building assembly.
Typical HOA submission packets include:
- Product data sheets
- Assembly test reports
- Proposed floor build-up details
- Sometimes pre- and post-installation inspections
Common Thresholds:
- IIC ≥ 50
- STC ≥ 50
- Luxury buildings: 55–60
Because acoustic results depend on the entire floor assembly, the same underlayment can perform very differently in two buildings.
If you absolutely require certified test documentation, availability can be limited depending on product type and assembly combination. That’s why verifying requirements before purchase is essential.
If you’re unsure where to start, reach out to our team at Acoustical Surfaces. One of our experienced consultants can help you evaluate your goals, building constraints, and flooring type to determine practical options – without overbuilding or overspending.
Moisture and Subfloor Prep (The Hidden Cost Triggers)
Many homeowners underestimate this part.
If you’re installing over concrete – especially below grade – you may need a separate moisture barrier. Some underlayments integrate one; others do not.
Common hidden cost triggers:
- High slab moisture levels
- Uneven subfloor requiring self-leveler
- Squeaky or damaged wood subfloors
- Adhesive removal from old tile
Moisture control is not optional. Trapped vapor can damage your finished floor and invalidate warranties.
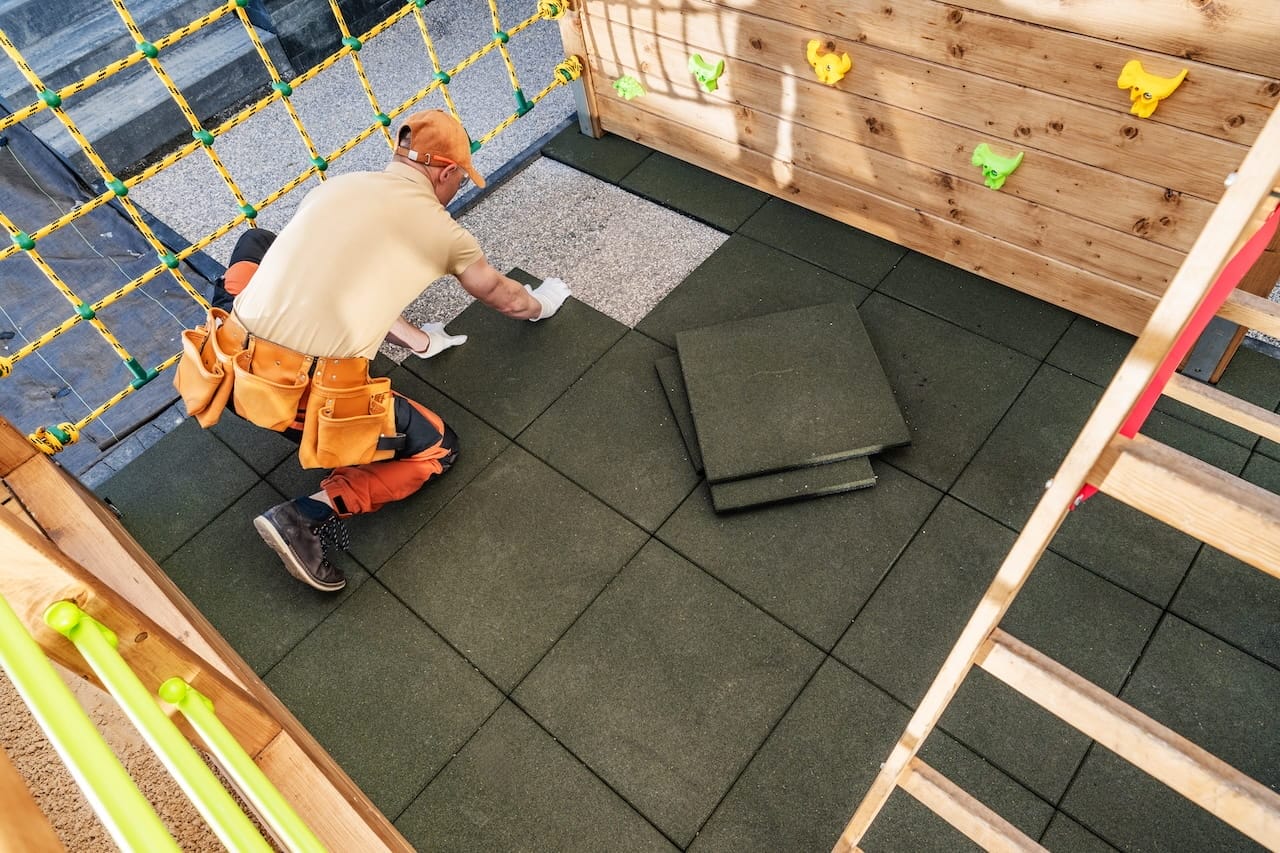
Installing Over Different Floor Types
Your installation method dramatically affects the budget.
Floating Floors (Laminate & LVP)
A laminate floor or click-lock vinyl plank often allows installation over existing hard surfaces if they are flat and stable. This can sometimes eliminate the $1–$2 per sq ft demo cost.
This is where floating floor soundproofing systems shine – quick install, lower labor, cleaner project.
Glue-Down Floors & Tile
Tile, glue-down LVT, and hardwood typically require full removal of old flooring. Labor can add $0.50–$5.40 per sq ft depending on complexity.
In these cases, underlayment becomes part of a more involved assembly.
What Actually Improves Floor Acoustics and Soundproofing
We must be realistic about our expectations when looking at different products. When comparing underlayment thickness 2mm vs 4mm, the increase in IIC may be incremental, not dramatic, so don’t expect an underlayment that is twice as thick to block twice as much sound. For example:
- 2mm system → around IIC 50 (However, this is extremely assembly-dependent)
- 4mm system → mid-50s in favorable assemblies (Again, this is extremely assembly-dependent)
The real driver is how the material interacts with:
- Slab or joist construction
- Ceiling assembly below
- Finished floor type
The best underlayment for condos isn’t universal. It’s the one that has proven performance within a similar assembly to yours.
Also important: matching material to the environment. High-humidity areas demand moisture protection. Heavy tile requires higher compressive strength than floating vinyl plank.
DIY vs Hiring a Pro
Deciding whether to handle underlayment installation yourself or bring in a professional depends on performance expectations, subfloor condition, and building requirements. Some projects are straightforward weekend installs. Others – especially in multifamily settings – demand technical precision, documentation, and assembly awareness to avoid costly mistakes or failed inspections.
DIY is realistic when:
- Installing foam under laminate or LVP
- Subfloor is flat and dry
- No HOA certification required
Watch for:
- Door and trim clearances
- Transition height changes
- Moisture barrier continuity
Professional installation is strongly recommended when:
- Targeting specific IIC/STC thresholds
- Working with dense rubber systems
- Leveling or structural repair is needed
- HOA documentation is required
In pro bids, underlayment often appears within that familiar $3.40–$5.30 per sq ft range as part of the total flooring scope.
How to Get an Accurate Quote
To avoid surprises, prepare before calling contractors. A few extra minutes gathering details on the front end can prevent change orders, missed requirements, or budget gaps once the project is underway. The more clearly you define your performance goals, existing conditions, and finish preferences, the more precise – and comparable – your bids will be.
- Measure each room carefully.
- Note the existing flooring type.
- Photograph transitions, stairs, and uneven areas.
- Confirm target ratings (IIC/STC ≥ 50, 55, or higher).
- Specify floor type (laminate, vinyl plank, tile, etc.).
Request itemized lines for:
- Underlayment material
- Installation labor
- Demo and haul-off
- Moisture barrier
- Leveling compounds
- Stair or trim adders
If you’re comparing cork vs rubber underlayment or evaluating a system with attached underlayment LVP, clarity in your quote makes comparison easier.
And if you need help sorting through options – or simply want to sanity-check your approach – contact one of our experienced consultants at Acoustical Surfaces. We can help you think through assembly constraints, performance targets, and budget realities so your project meets expectations the first time.
Final Thoughts on Acoustic Flooring Cost
Ultimately, acoustic flooring cost isn’t just about the roll of padding under your floor. It’s about the entire system: structure, moisture conditions, floor type, and required performance targets.
For simple DIY installs, your underlayment may cost well under a dollar per square foot. For multifamily remodels targeting HOA approval, the installed underlayment portion often lands in the $3.40–$5.30 per square foot range, with additional costs driven by prep and demolition.
The key is matching the right product to the right assembly – and verifying requirements before you buy. When you take that approach, you’re not just estimating acoustic flooring cost – you’re investing in performance that protects your remodel, your neighbors, and your peace of mind.
When it comes to optimizing room acoustics, the type of soundproof acoustic floor underlayment we ultimately choose comes down to the flooring material we choose. Luckily, recycled rubber is a great choice for most types of flooring, whether you’re using it under your hardwood floor, or as a soundproof carpet pad underlay.
If you want to be sure you’re choosing the best materials for your acoustic flooring application, it’s always helpful to enlist the help of the pros. They can ensure you get the most out of your soundproofing endeavor, and make the entire process a whole lot easier.

