How Many Acoustic Panels Do I Need for My Space?
When asking the question, “how many acoustic panels do I need”, it helps to think beyond just counting panels. The right amount depends on your room’s size, shape, surfaces, the use or the type of sound being generated in the room and what you want it to sound like when you’re done. Whether your goal is a quiet conference room, a precise home studio, or simply making a large space more comfortable for occupants, knowing the basics of acoustic panel coverage and sound absorption percentage is key.
Rooms generally fall into two types:
- Spaces that need to sound a specific way for a specific purpose, like a recording studio, two-channel listening room, or home theater.
- Spaces that just need the edge taken off–rooms where reverberation control is more about comfort than precision like a cafeteria or restaurant, fellowship hall, or commercial place of business
In the first type, placement is crucial. Panels must be positioned at first reflection points, in corners, and sometimes across the ceiling to control echo. In the second type, placement is more flexible, and overall wall treatment area relative to the room’s volume matters more than exact location.
Why the Number of Acoustic Panels Matters
The number of panels in a room directly affects how sound behaves. If the room is too absorptive, it will be overly quiet and sound “dead.” If it is too reflective, the room will sound loud and chaotic. Both too many panels and too few panels can be equally problematic, depending on the room’s use. These key points will help inform the proper number for your space.
- Reverberation Time (RT60): The square footage of panels relative to room surfaces and cubic volume determines how long sound lingers. More panels reduce RT60, but there’s a point of diminishing returns.
- More isn’t always better: Installing panels just to fill space can deaden a room, creating a flat, unnatural sound.
- Thicker panels aren’t always necessary: For most high and mid-frequency ranges (speech and music that isn’t too bass-heavy), standard 1-2 inch panels are sufficient. Thicker panels mainly help with low-frequency control, especially in corners.
- Balance absorption and natural room tone: Your goal is usually to reduce unwanted echoes without making the room sound completely dead. Achieving the right balance requires attention to both quantity and placement of panels.
Even in rooms that are more about comfort than precision, knowing the coverage of wall-mounted acoustic panels relative to surface area ensures that echo and noise are reduced effectively. In spaces that demand accuracy, precise placement–like first reflection points and bass trap placement in corners–can have a bigger impact than simply adding more panels.
Consider the Cubic Volume of the Room
When planning acoustic treatment, it’s not just about floor space–the height of the ceiling and total cubic volume of the room matter a lot. Two rooms with the same floor area can behave very differently acoustically if one has a high ceiling and the other has a low ceiling.
- Room volume = length x width x height.
- Larger volumes generally require more treatment to achieve the same reverberation control.
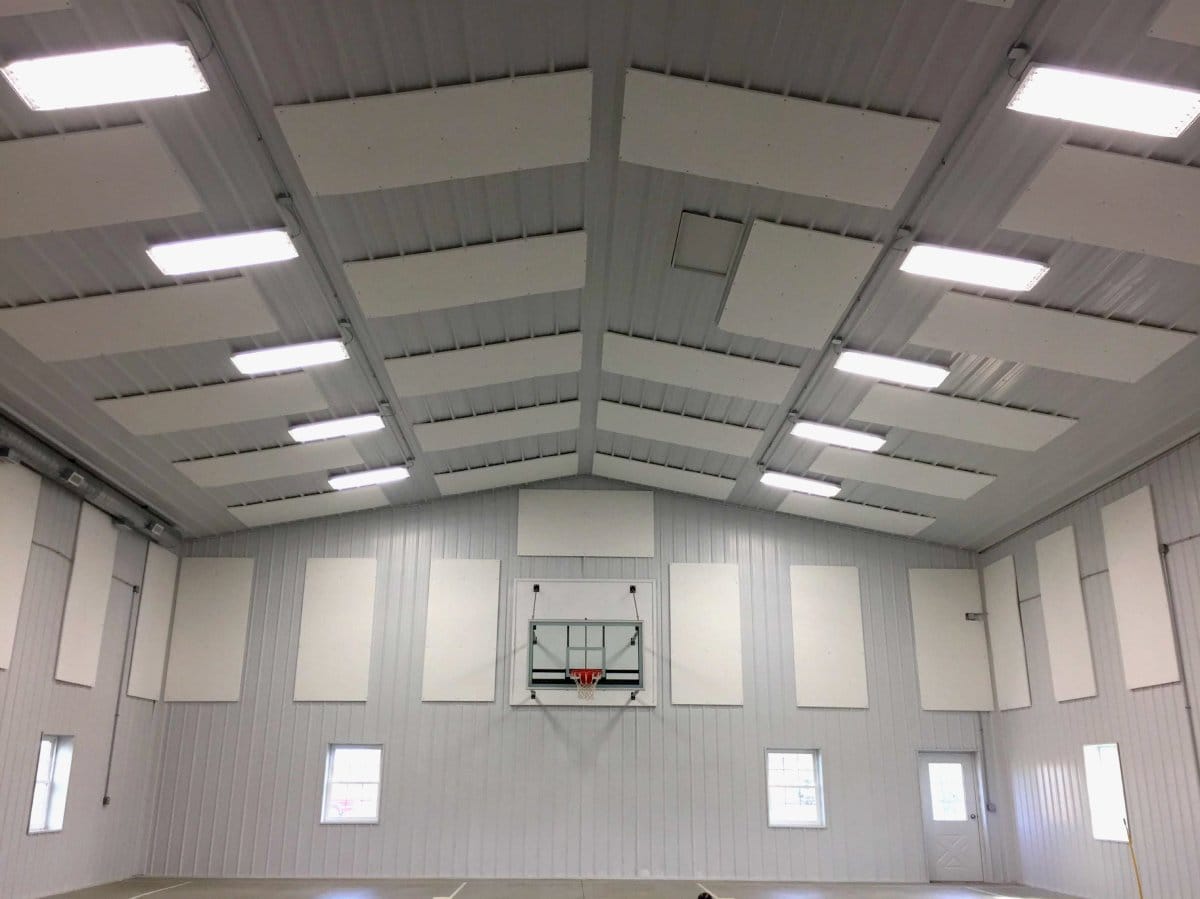
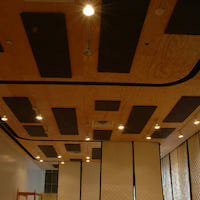
- In small rooms, treating side walls may be sufficient. In large rooms, you might also need ceiling acoustic treatment, such as ceiling mounted acoustical panels, hanging clouds or baffles, to control reflections effectively.
A practical rule of thumb is to think about the percentage of the room’s volume that should be treated rather than just counting panels. Typical treatment targets range from 3-6% of the cubic volume, depending on the room’s use and the reflectivity of the surfaces.
Your Acoustic Goals
Defining your room acoustic goals is a critical early step. The intended use of the space will influence both the amount of treatment and placement strategy.
- Speech clarity: Offices, conference rooms, and classrooms often aim for moderate reverberation reduction to improve speech intelligibility and optimize conference room acoustics for meetings and presentations.
- Music recording or mixing: Home studios and control rooms require precise control across a wider frequency range, including careful attention to bass trap placement and first reflection points. Proper home studio soundproofing and acoustic treatment ensures recordings are clean and free from unwanted room noise.
- Noise reduction: In restaurants, lobbies, or open-plan offices, the goal is often to simply reduce echo and general noise without creating a “dead” environment.
The desired outcome affects how aggressive you need to be with panels and whether sound diffusion vs absorption comes into play. Sometimes, a mix of echo reduction panels and diffusers produces the most natural sound without over-absorbing the space.
This table provides basic guidelines for treating spaces for different acoustic goals:
| Goal | Typical Treatment | Placement Notes |
| Speech Clarity | 3-5% of cubic volume | Walls and ceilings, focus on reducing early reflections |
| Music Recording | 4-6% of cubic volume | First reflections, corners, ceiling clouds, some diffusion |
| General Noise Reduction | 3-5% of cubic volume | Spread panels evenly, placement is less critical |
What is the Room’s Purpose?
The purpose of the space plays a huge role in determining acoustic goals and how many acoustic panels you need, as well as where to place them.
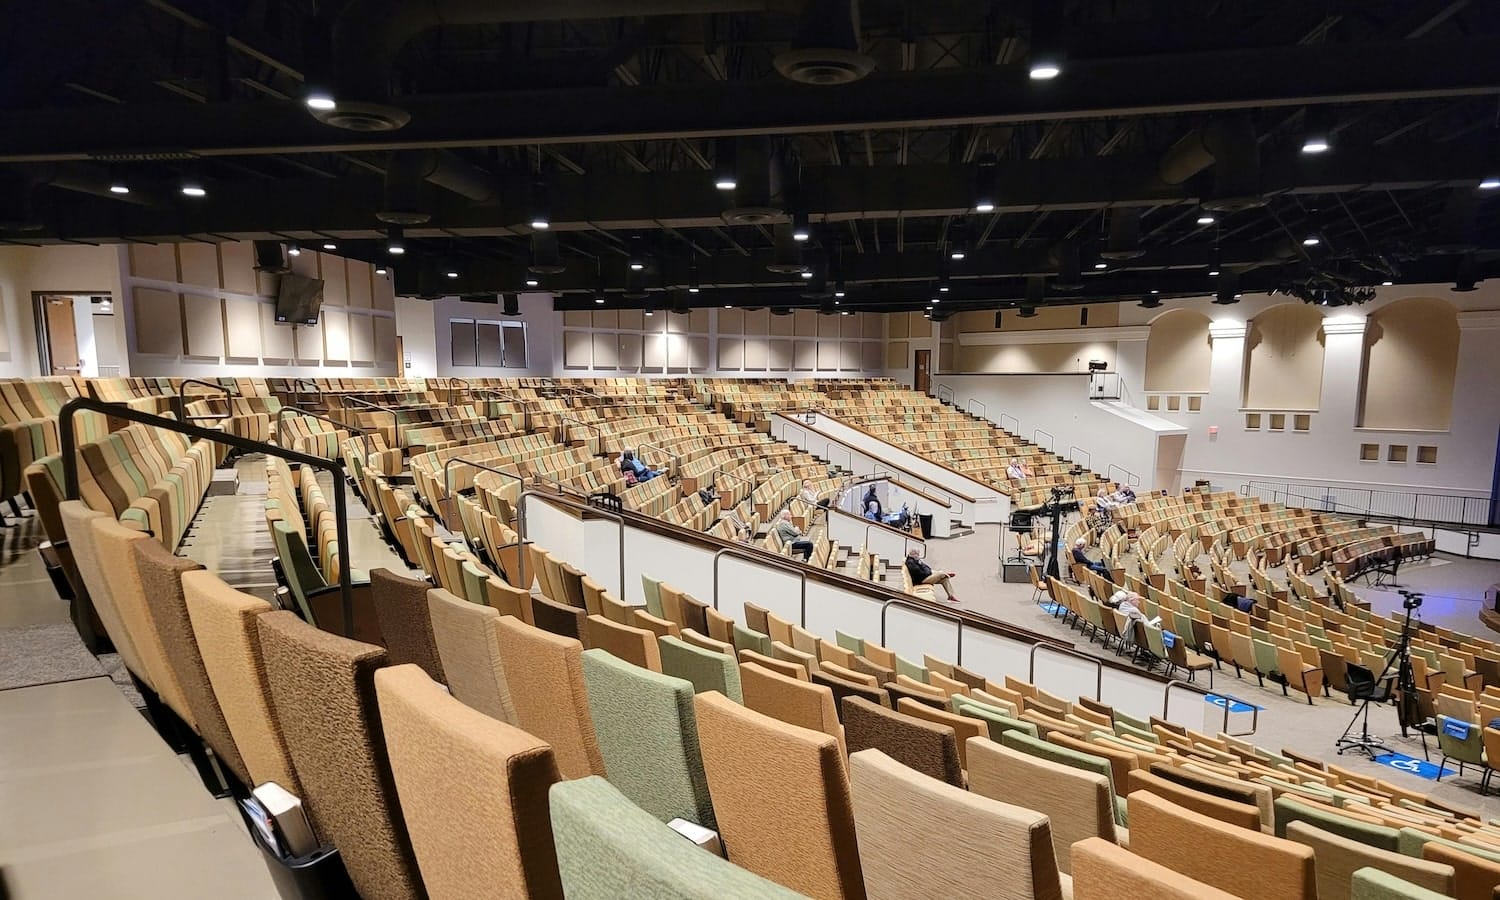
- Home theaters, recording studios, and media rooms: These spaces require precise control. Panels should be installed at first reflection points, corners (bass traps), and opposite walls to reduce standing waves. A combination of wall-mounted acoustic panels and ceiling clouds help maintain accuracy.
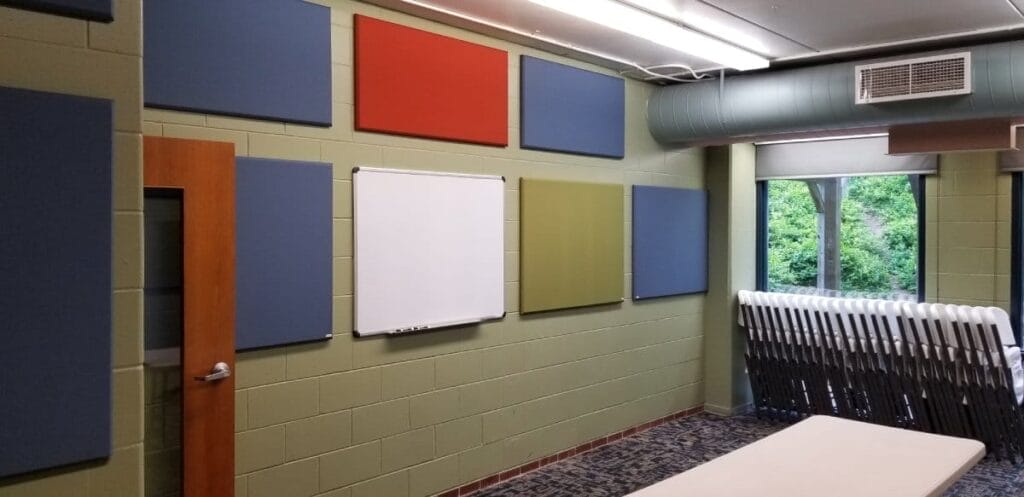
- Offices, classrooms, restaurants, and lobbies: These spaces typically just need general noise reduction. Exact placement is less critical, and distributing panels throughout the room usually achieves the desired reverberation control and comfort.
Usage also influences whether thick panels, bass traps, or diffusers are necessary. Rooms intended for speech clarity may achieve goals with lighter, evenly spread panels, while music or recording spaces often need higher-density treatment and precise placement.
Surface Materials in the Room
The materials covering your walls, floors, and ceilings determine how much additional treatment is needed.
- Hard surfaces (drywall, glass, concrete, tile, wood) reflect more sound and usually require more panels to reach your target sound absorption percentage.
- Soft surfaces (carpet, curtains, upholstered furniture, plants) already absorb some sound, reducing the number of panels needed.
Even with soft furnishings, adding wall-mounted acoustic panels is typically necessary to help control troublesome reflections. On the other hand, rooms with mostly reflective surfaces often need a combination of wall panels, ceiling treatment, and possibly bass traps to manage low frequencies and prevent flutter echoes.
The key is assessing both the room’s surfaces and its volume. A large room with mostly reflective materials may require a higher percentage of coverage than a small, furnished room with soft finishes.

General Guidelines for Acoustic Panel Coverage
A practical starting point for most rooms is to consider the percentage of cubic volume to be treated and extrapolate from there. A commonly used rule of thumb is:
Total panel area required = Room volume x 4%
For example:
| Room Type | Volume in Cubic Feet | % Used | Panel Area in Square Feet |
| Small Office
(15 x 20 x 8) |
2,400 | 4% | 96 sq ft |
| Conference Room
(30 x 40 x 10) |
12,000 | 4% | 480 sq ft |
| Control Room
(25 x 30 x 12) |
9,000 | 5% | 450 sq ft |
| Large Auditorium
(60 x 80 x 20) |
96,000 | 5% | 4,800 sq ft |
How to Calculate the Right Number of Panels
Step 1 – Measure Your Room Dimensions
Measure the length, width, and height of the room. If your room is 40’ x 60’ x 10’, then you would multiply those dimensions to come up with a volume of 24,000 cubic feet.
Step 2 – Calculate the Total Wall Surface Area
Using 4% as your baseline, multiply that 24,000 by 0.04 to arrive at 960 square feet of panels. If you wanted only 3% coverage, you would multiply by 0.03, and if you wanted 5%, you would multiply by 0.05 to arrive at your ideal amount of coverage.
Step 3 – Adjust for Room Conditions
- Add extra panels if the room is made up of mostly hard surfaces like drywall, concrete, glass, or metal.
- You can reduce the panel count slightly if the room has a lot of soft furnishings like carpet, drapes, and upholstered furniture.
- Adjust the count based on your acoustic goals–for precise recording or listening spaces, more panels may be required; for general noise reduction, the baseline is usually enough.
This formula isn’t a magic solution, but it’s reliable enough for quickly estimating how much coverage is needed and helps guide placement, product choice, and budgeting.
Step 4 – Plan Placement for Maximum Effect
- High-performance spaces: Place panels at first reflection points, corners (bass traps), and on opposite walls to manage standing waves. Ceiling clouds may also be necessary in some spaces.
- General-purpose spaces: Panels can be distributed throughout walls or ceilings to achieve effective echo reduction without worrying about exact reflections. Place panels in locations that look good, where they are inconspicuous, or simply in locations where you have space for them.
For high-ceilings or open rooms, ceiling acoustic treatments can make a significant difference in overall reverberation control. Using an acoustic panel calculator can help visualize coverage and refine your plan before ordering.
Placement Tips for Maximum Effectiveness
Proper placement ensures your panels perform efficiently and that your acoustic goals are met. Here are some key considerations to get the most out of your acoustic treatment plan:
- First reflection points: Key treatment points for high-performance spaces. Use the mirror trick to locate them–sit in your listening or speaking position, and have someone slide a mirror along the side walls. Wherever you can see the speaker in the mirror is a reflection point, and adding a panel there significantly improves clarity.
- Symmetry: Aim for balanced treatment on opposite walls to avoid uneven reflections.
- Corners: Low-frequency energy accumulates in corners. Installing bass traps here addresses standing waves and reduces muddiness.
- Ceiling treatment: High or reflective ceilings can often cause unwanted echoes. Hanging ceiling acoustic treatment like panels or clouds captures these reflections effectively.
- Mix absorption and diffusion: In many rooms, combining noise reduction panels with diffusers preserves a natural sense of space without over-absorbing.
- Spread panels evenly: Avoid clustering all panels in one area, which can leave untreated “dead spots” elsewhere in the room.
Final Checklist Before You Buy
- Know your room size and usage.
- Determine what colors or aesthetics you will need for your space.
- Determine your budget for the project.
- Determine the timeline – some products will be in stock while others need to be manufactured, converted, cut, or painted.
- Decide on treatment percentage.
- Think about the ceiling and consider if some of these acoustic panels will be directly mounted to or suspended from the ceiling.
- Plan balanced placement for even sound.
- Understand the hardware and installation process if you are doing the installation yourself.
- Order a free set of product samples so you can see, touch and fully understand the potential options before you make a purchase. Pictures and details on websites don’t convey as much as a physical piece of an actual product.
- Contact Acoustical Surfaces to discuss all of these options and variables, order a free box of product samples, and get exactly what you need.
For any project, it helps to speak with experts who understand the nuances of acoustic treatment. Acoustical Surfaces can guide you through panel selection, placement strategies, and coverage calculations to meet your specific goals. Contact one of our team members today to discuss your space, explore options, and ensure you get the right acoustic treatments for your needs.


3 Comments
Mitch
Thanks for the rule of thumb! I have a critical listening room that is 30’L x 15’W and 8’H. The stereo speakers are along the long wall. The room is comprised of hardwood floor, windows, and bare drywall, inlcuding the ceiling.
I am interested in your dBA panels as it looks like I can just glue them on the drywall. Using the calculation, it appears I need 108 sq ft of product. Is that right? Also, how do I choose between the 1″ or 2″ thickness?
Finally, where should they be placed? I presume the ceiling and back wall where the stereo is pointing? How far apart do I install the panels from each other in order to be effective?
Many thanks!
Ted W
Thanks for the Comment, Mitch.
We may want to talk a little bit about a critical listening room as the “rule of thumb” is really a better formula to “take the edge off” of a room and simply reduce the overall reverberation time. A critical listening room is likely going to need a more room-specific approach.
Would you be able or willing to send me a sketch of the room showing the general location of everything and maybe a digital photo or two so that I could have a look at it and help lay out a plan of attack for you?
The dBA panels may or may not be the best for you, that is going to depend on the room itself. Most of our products can be glued or mounted directly to the wall. The “best” approach may be to use a few different products in specific locations.
If you are able to send me a bit more information about the room, please use [email protected] and include your contact information.
Thank you!!!
Ted
How to Sound Proof a Dorm Room? [Low Budget Solution]
[…] Effective placement strategies for these panels can significantly enhance their sound absorption capabilities. Acoustic treatment in your dorm doesn’t just minimize disturbances; it also elevates sound quality for studying or relaxing. Choose from various styles to maintain a cohesive look while effectively managing sound in your living space. […]