Print Page
DURACOUSTIC S.T.O.P.™ Installation Instructions
Product Testing & Information
Floor Impact Noise Reduction Underlayment
DURACOUSTIC INSTALLATION INSTRUCTIONS
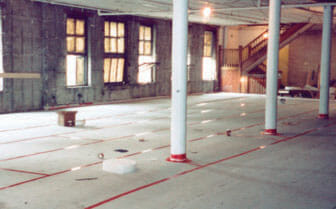
- SUB-FLOOR: Make sure the subfloor is structurally sound, flat and dry.
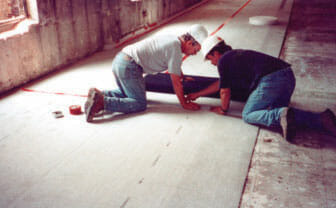
- DURACOUSTIC: Install rubber face down. Adjoining edges should be butted and taped with duct tape.
- PERIMETER: Install polyethylene foam or fiberglass board at the perimeter of the entire subfloor and around any protrusions through the installation. The isolation of the floating floor prevents flanking between floor and walls. Tape or tack-glue the isolation material.
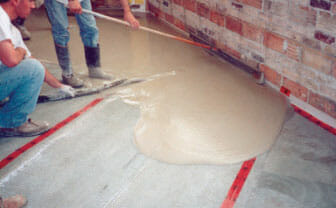
- GYPSUM CONCRETE: When a gypsum concrete overlay is poured, please refer to supplier’s instructions.
- CEMENT BOARD (2 Layers): The two layers of ½″ cement board must be applied at 90° to one another with a ¼″ gap between the units and an 8″ minimum overlap. Each gap should be joined with a 2″ fiberglass tape embedded into ceramic mortar. The two layers must be glued together using ¼″ square trowel (full coverage).Leave ¼″ space around the perimeter of the floor and fill the gap with acoustical mastic.
- PLYWOOD: The two layers of plywood must be 90° to one another, joints gapped and offset, top sheet glued (full coverage, non water based) to bottom sheet.The two layers fastened with screws in corners and center with no penetration into DURACOUSTIC (prevents flanking). The plywood should be ½″ for hardwood floors and 3/8″ for ceramic, vinyl, carpet with pad. (See below for approved assembly of solid hardoow floor with plywood.)
APPROVED ASSEMBLY OF SOLID HARDWOOD FLOOR WITH PLYWOOD
This will create a floating hardwood floor on plywood assembly over DURACOUSTIC.
- Make sure sublfoor is clean, dry, and flat. If some areas require fill patching or leveling, use a self leveling underlayment.
- Must check subfloor for excessive moisture. If a moisture barrier is needed, use a suitable vapor barrier or moisture sealer.
- Loose lay DURACOUSTIC on subfloor, do not glue.
- Make sure DURACOUSTIC covers the perimeter of the entire subfloor and around any protrusions.
- Always install black side down.
- The DURACOUSTIC seams must be placed tightly together and taped with duct tape.
- Loose lay the first layer of plywood (¾″) on DURACOUSTIC.
- Install second layer of plywood (½″) on top of the first layer of plywood. The top layer of plywood must be perpendicular to the bottom layer, joints gapped and offset, top sheet glued (full coverage, non water based adhesive) to bottom sheet. The top layer fastened with 1″ #8 flat head screws every 12″ with no penetration into DURACOUSTIC.
- Nail down hardwood floor on the plywood without penetrating the DURACOUSTIC.